You have been warned!
With the most recent Windows 1809 build, even more policies have been put in place with the windows defender. But if you are like me and use alternative (better) methods of protecting your computer and are fed up with the false-positives you get with the Defender, the following clipped items found at both ghacks.net and windowscentral.com
How to permanently disable Windows Defender Antivirus on Windows 10
If you must permanently disable Windows Defender Antivirus on Windows 10, use this guide to learn the steps on how to do it.
Windows Defender Antivirus is the free malware solution that Microsoft includes on every installation of Windows 10. It's a security software package meant to provide the first line of defense to protect your device and data against malware, including viruses, ransomware, rootkits, spyware, and other types of malicious programs.
Although the antivirus runs automatically, and it can disable itself as you install a third-party security software, the only caveat is that Windows 10 doesn't offer a way to disable it permanently. Perhaps the obvious reason is that Microsoft doesn't want you to use your device without any protection, which is a good thing.
However, there are still some cases where some users may prefer not to use Windows Defender Antivirus, such as on a kiosk device that isn't connected to a network and where peripheral connectivity isn't allowed.
How to disable Windows Defender Antivirus using Group Policy
On Windows 10 Pro, it's possible to use the Group Policy Editor to disable the Windows Defender Antivirus permanently.
Use the Windows key + R keyboard shortcut to open the Run command.
Type gpedit.msc and click OK to open the Local Group Policy Editor.
Browse the following path:
Computer Configuration > Administrative Templates > Windows Components > Windows Defender Antivirus
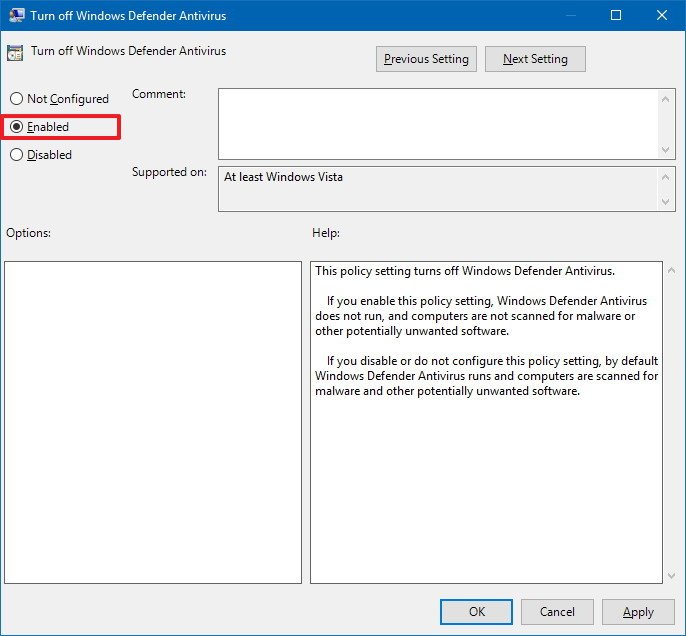
On the right side, double-click the Turn off Windows Defender Antivirus policy.
Select the Enabled option.
Click Apply.
Click OK.
Browse the following path:
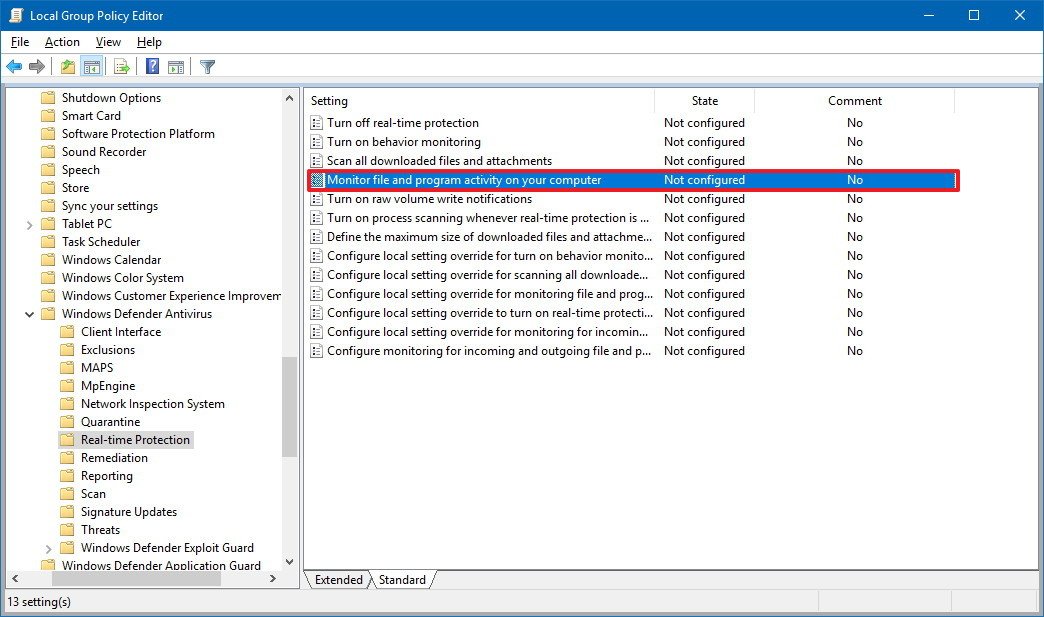
Computer Configuration > Administrative Templates > Windows Components > Windows Defender Antivirus > Real-time Protection
On the right side, double-click the Turn on behavior monitoring policy.

Select the Disabled option.
Click Apply.
Click OK.
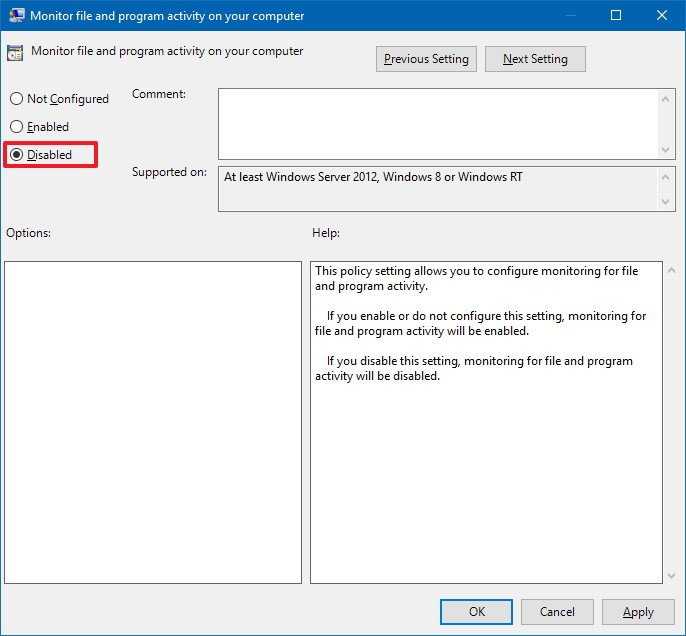
On "Real-time Protection," double-click the Monitor file and program activity on your computer policy.
Select the Disabled option.
Click Apply.
Click OK.
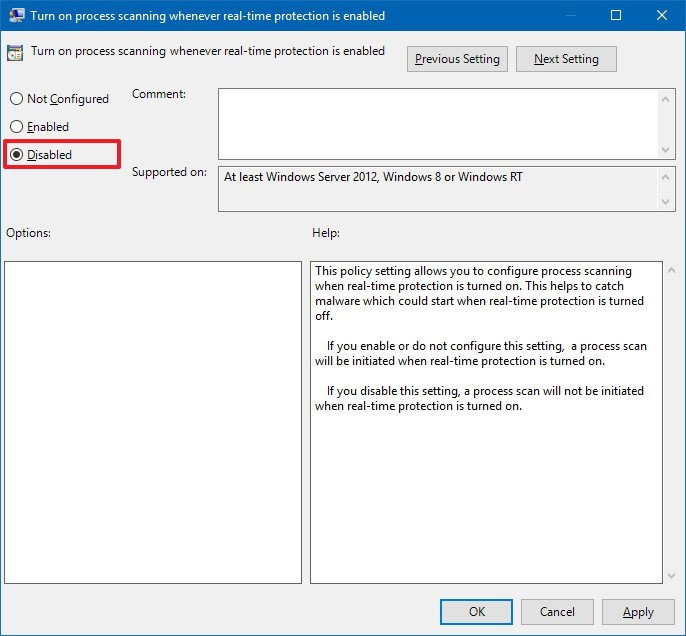
On "Real-time Protection," double-click the Turn on process scanning whenever real-time protection is enabled policy.
Select the Disabled option.
Click Apply.
Click OK.
On "Real-time Protection," double-click the Turn on behavior monitoring policy.
Select the Disabled option.
Click Apply.
Click OK.

Restart your computer.
Once you've completed the steps, Windows Defender Antivirus will no longer scan and detect malware on your device, even after restarting your computer.
At any time, you can enable the Windows Defender Antivirus using the same steps, but on step No. 5, 10, and 14, make sure to select the Not Configured option. Then just restart your device to apply the changes.
How to disable Windows Defender Antivirus using Registry
The Local Group Policy Editor is not available on Windows 10 Home, but you can still achieve the same results changing the Registry settings.
Warning: This is a friendly reminder that editing the registry is risky, and it can cause irreversible damage to your installation if you don't do it correctly. It's recommended to make a full backup of your PC before proceeding.
Use the Windows key + R keyboard shortcut to open the Run command.
Type regedit, and click OK to open the Registry.
Browse the following path:
HKEY_LOCAL_MACHINE\SOFTWARE\Policies\Microsoft\Windows Defender
Right-click on the Windows Defender (folder) key, select New, and click on DWORD (32-bit) Value.
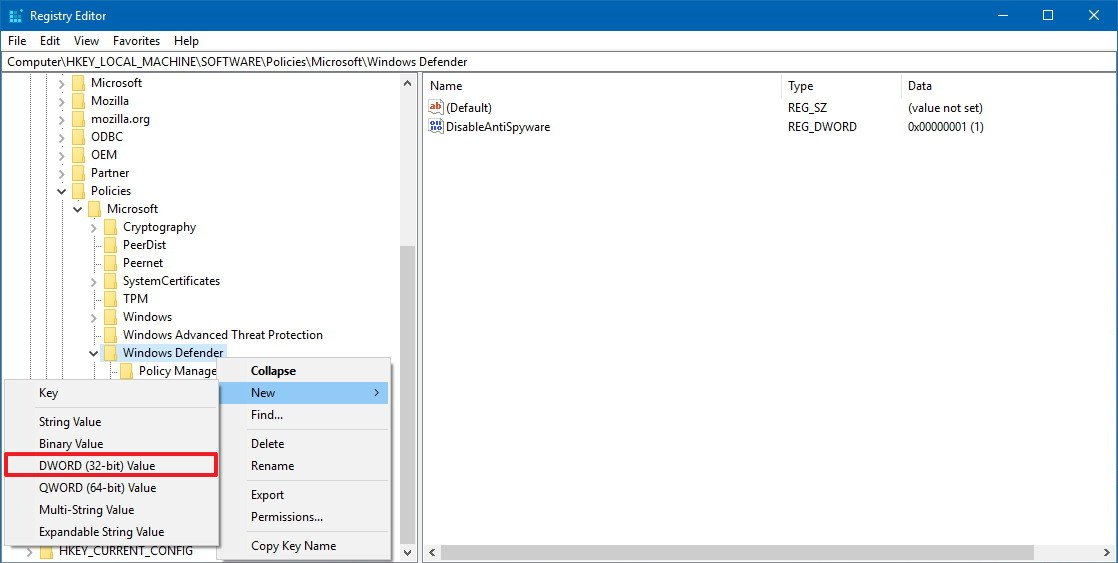
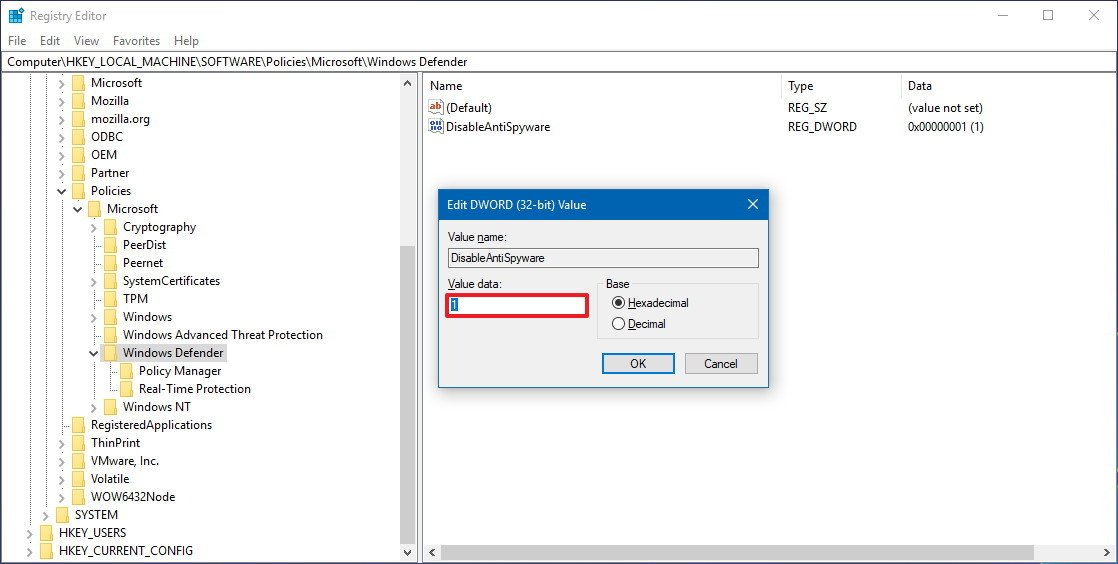
Name the key DisableAntiSpyware and press Enter.
Double-click the newly created key and set the value from 0 to 1.
Click OK.
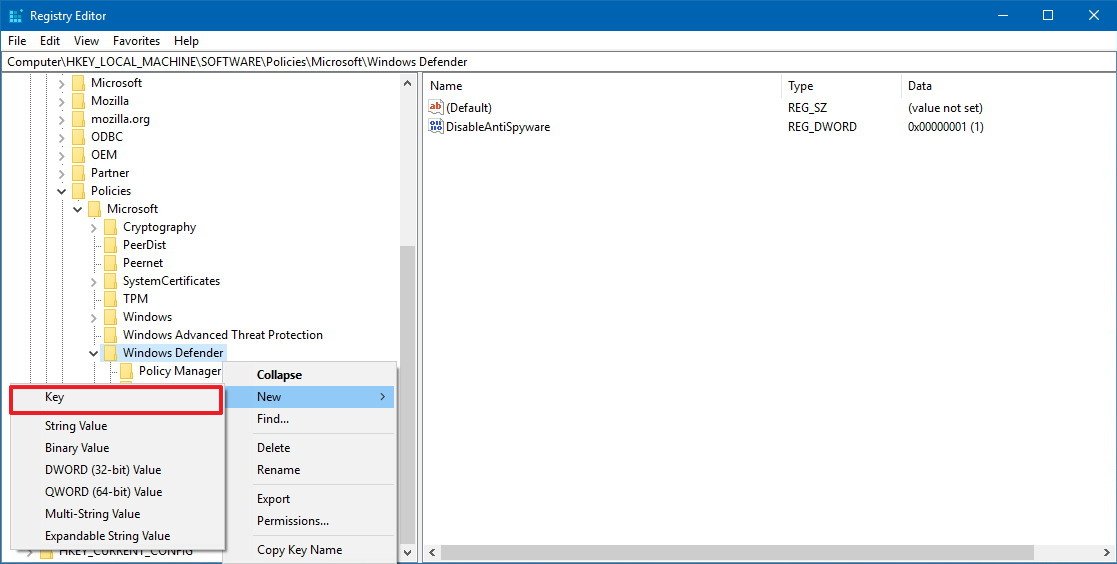
Right-click on the Windows Defender (folder) key, select New, and click on Key.
Name the key Real-Time Protection and press Enter.
Right-click on the Real-Time Protection (folder) key, select New, and click on DWORD (32-bit) Value.
Name the key DisableBehaviorMonitoring and press Enter.
Double-click the newly created key and set the value from 0 to 1.
Click OK.

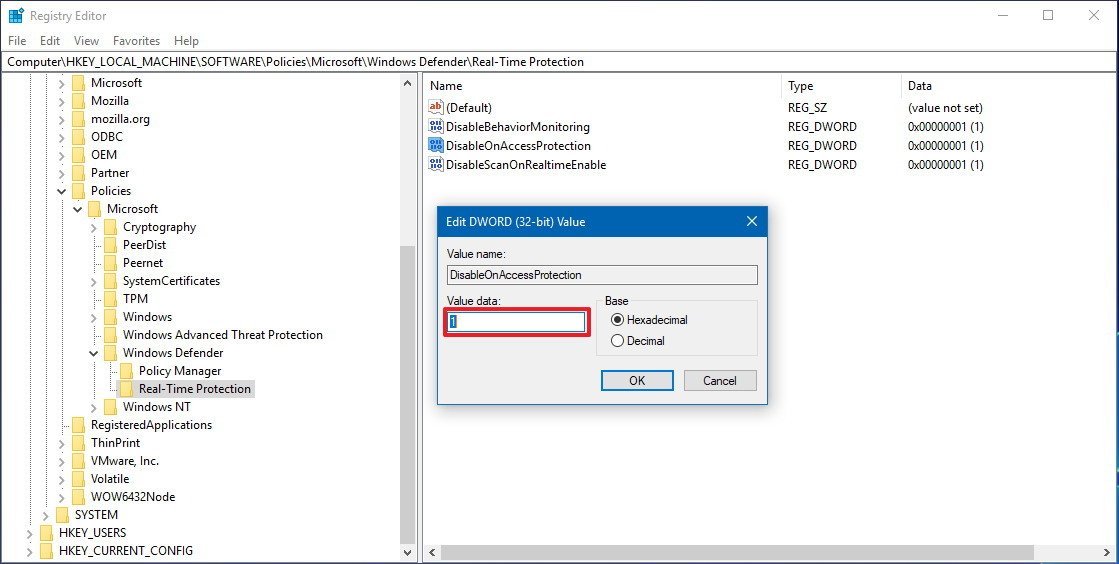
Right-click on the Real-Time Protection (folder) key, select New, and click on DWORD (32-bit) Value.
Name the key DisableOnAccessProtection and press Enter.
Double-click the newly created key and set the value from 0 to 1.
Click OK.
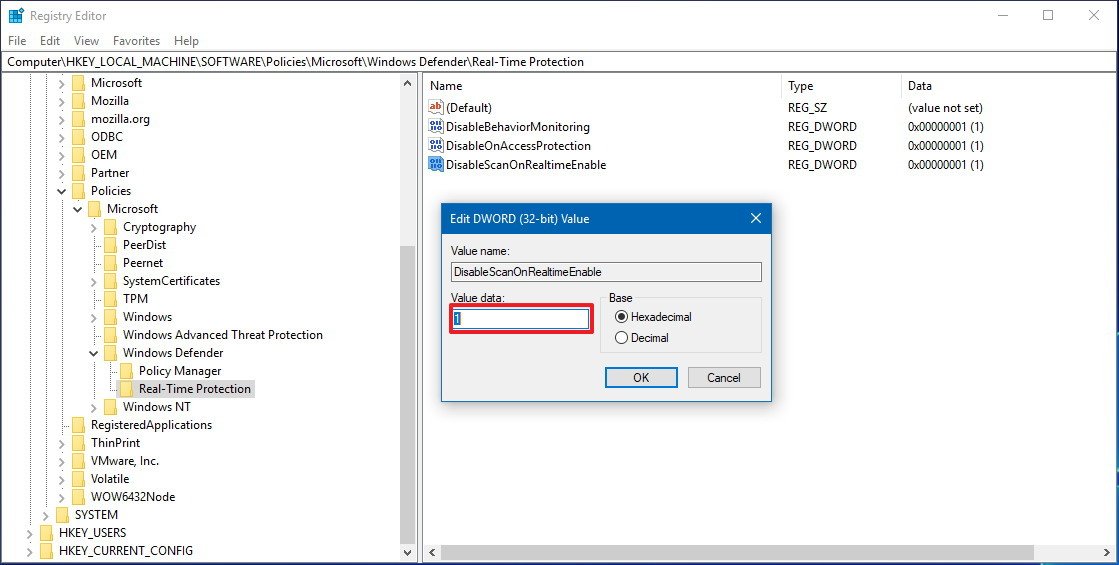
Right-click on the Real-Time Protection (folder) key, select New, and click on DWORD (32-bit) Value.
Name the key DisableScanOnRealtimeEnable and press Enter.
Double-click the newly created key and set the value from 0 to 1.
Click OK.
After completing the steps, simply restart your computer to disable the Windows Defender Antivirus permanently.
If you change your mind, you can always revert the changes using the same instructions, but on step No. 3, right-click the DisableAntiSpyware key, and select Delete. Then inside the Windows Defender (folder) key, right-click the Real-Time Protection (folder) key and select Delete to remove key and its content. Finally, restart your device to complete reverting the changes.
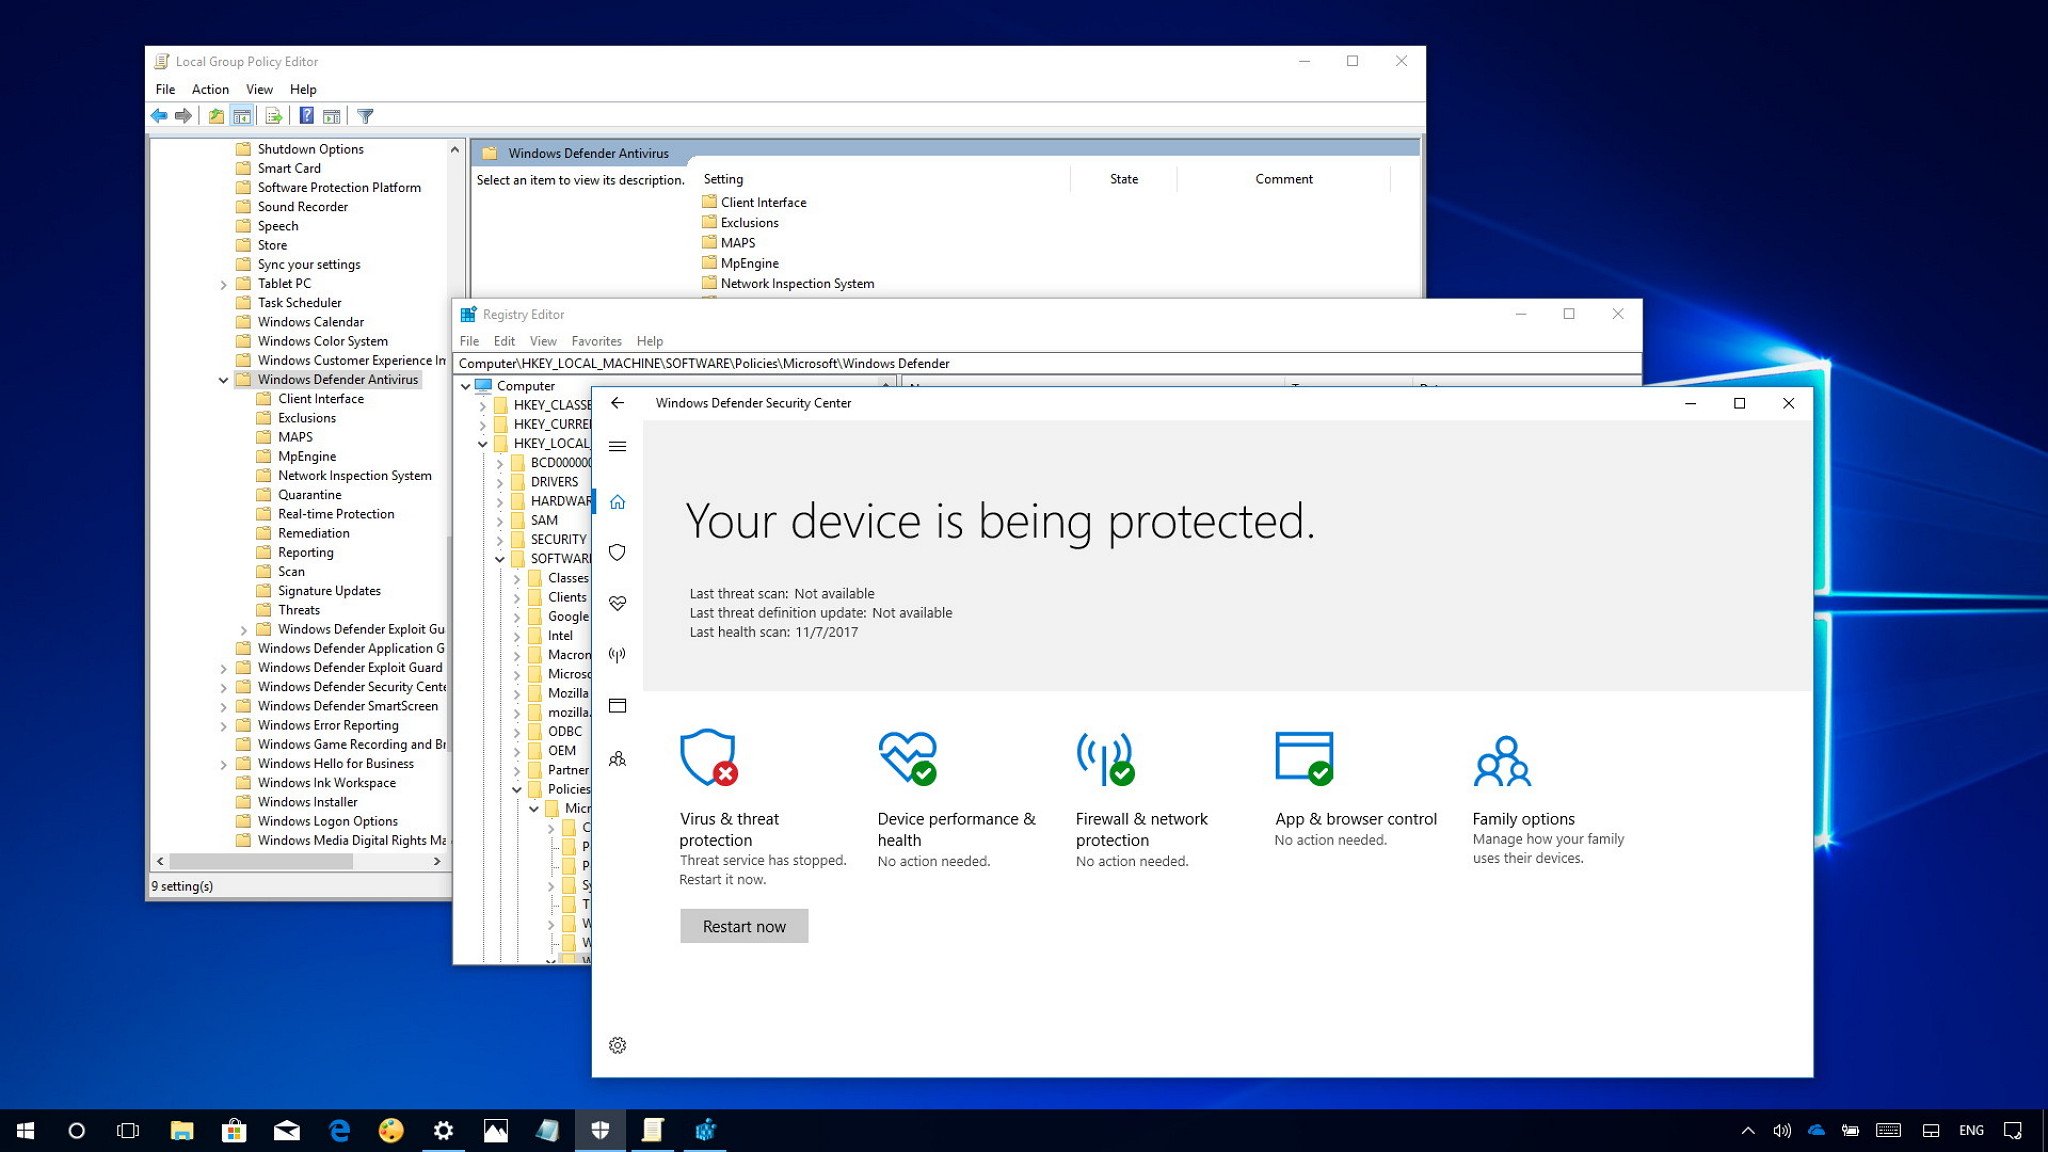
How to disable Windows Defender Antivirus using Security Center
Alternatively, if you're installing a piece of software that requires deactivating the antivirus to install correctly, or you simply want to disable the Windows 10 built-in antivirus temporarily, you can use the following steps:
Open Windows Defender Security Center.
Click on Virus & threat protection.
Click the Virus & threat protection settings option.
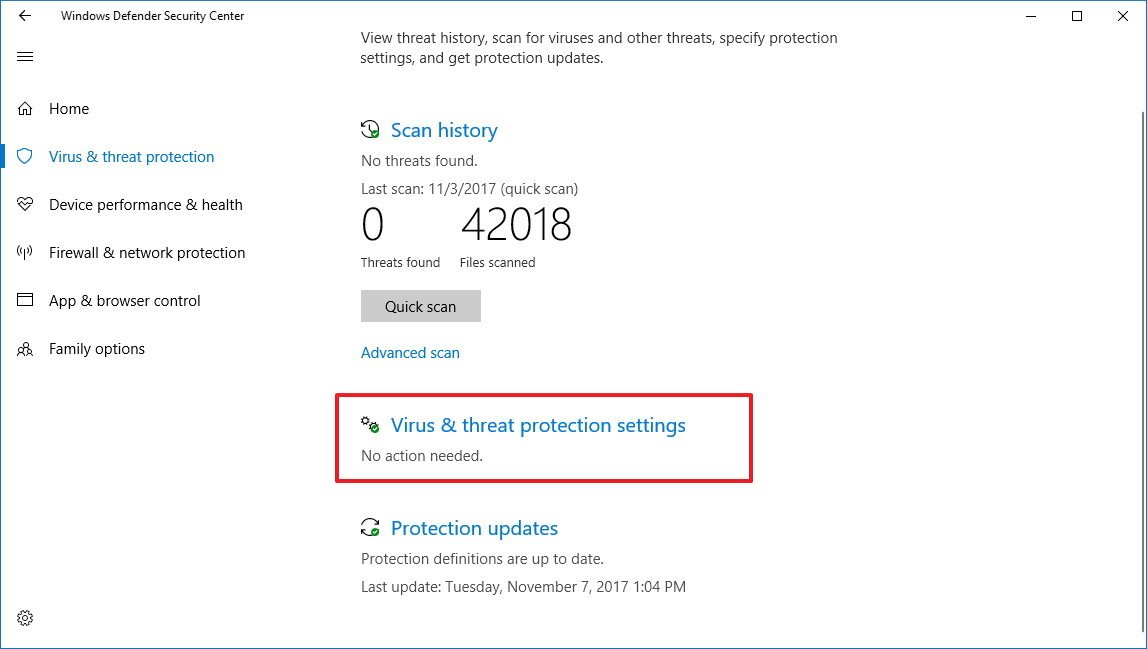
Turn off the Real-time protection toggle switch.

After completing the steps, Windows Defender Antivirus will be disabled making it unable to monitor and stop malware from taking over your device. However, this is a temporary solution, eventually, the antivirus will re-activate automatically after you restart your device.
Wrapping things up
While there could be scenarios where you may need to disable the antivirus, it's never recommended to have your device without malware protection.
If you're trying to get rid of Windows Defender Antivirus because you prefer another security software, you should know that the built-in antivirus will disable itself automatically during the installation of third-party security software.
It's should also be noted that the shield icon will continue to appear in the notification area of the Taskbar because it's the Windows Defender Security Center Iconicon, not merely dedicated to the antivirus.
----------------------------------------------
Windows Defender is the default antivirus solution that ships with Microsoft's Windows 10 operating system.
It is turned on by default unless antivirus solutions are installed that Windows Defender recognizes.
Despite contrary reports, it is still possible to turn off Windows Defender if it does not recognize another antivirus solution or none is installed on the system.
One option to do so is by enabling the "Turn off Windows Defender" policy in the Group Policy editor. The confusion came from Windows Defender's real-time protection feature which turns itself back on after being turned off.
Manage Windows Defender Notifications
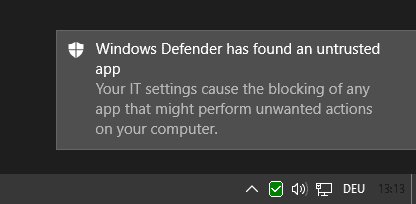
Windows Defender displays notifications about certain events by default automatically on the desktop. This is the case for critical events that require user interaction, for instance if a download was blocked.
The latest version of Windows Defender ships with a feature called "enhanced notifications" which may inform you events that are not critical. This can be something as mundane as informing you that the last scan did not detect any issues.
Windows 10 users have several options to manage Windows Defender's notification behavior.
Option 1: The Settings
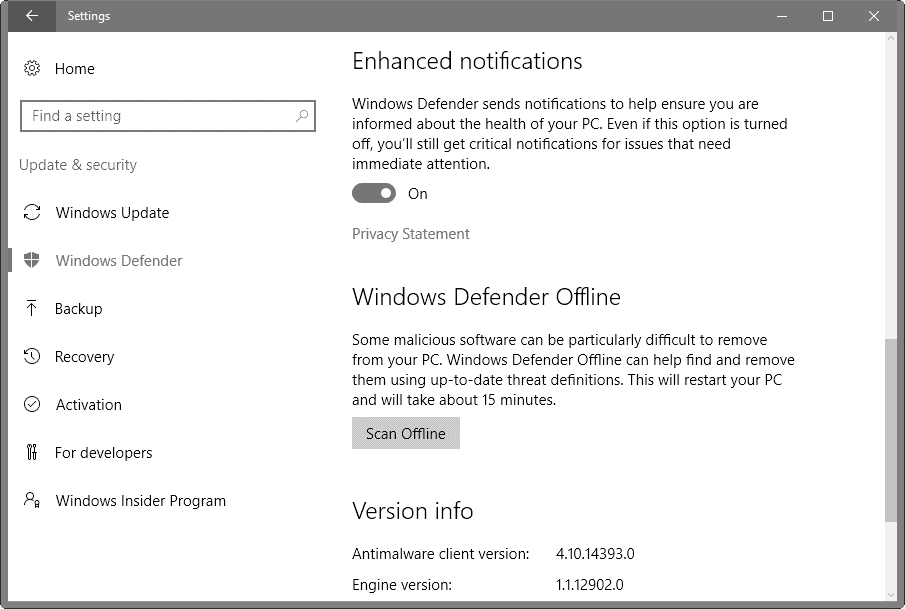
You may enable or disable enhanced notifications in the settings but that is about it.
Tap on Windows-I to open the Settings application on the desktop.
Select Update & Security, and then Windows Defender.
Scroll down until you find the enhanced notifications preference. Use the toggle to switch it on or off.
Option 2: Group Policy
The Group Policy is the better location to control Windows Defender notifications as it gives you more control over the functionality. There you find the option to turn off Windows Defender completely as well.
Please note that access to the Group Policy is restricted to Professional versions of Windows 10. This means that Home users don't have access to it. Jump to Option 3 instead.
Do the following to open the Group Policy Editor.
Tap on the Windows-key, type gpedit.msc, and hit enter.
Suppress all notifications
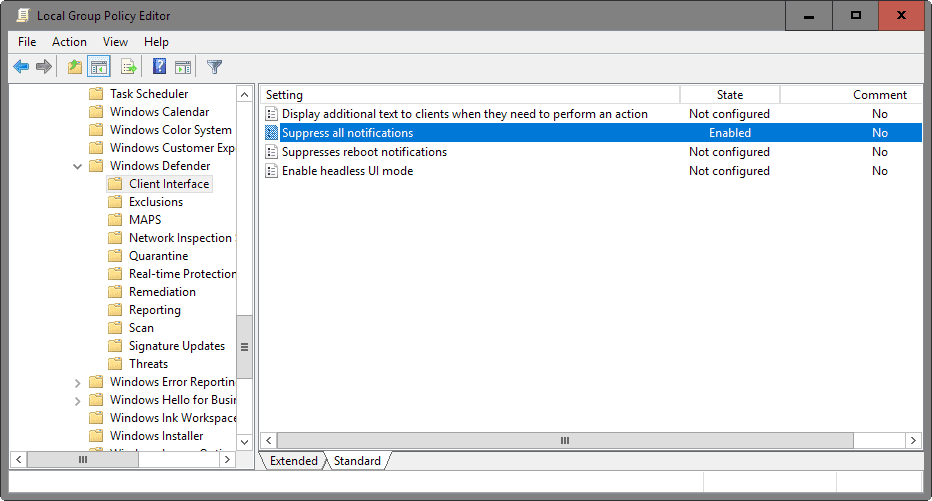
Computer Configuration > Administrative Templates > Windows Components > Windows Defender > Client Interface
If you enable "suppress all notifications", notifications are no longer displayed on clients. While that does take care of notifications on the desktop, it means that you may not receive information about critical events, blocked downloads or removed files among other things.
Option 3: Windows Registry
You may turn off all Windows Defender notifications using the Windows Registry. This method is identical to using the Group Policy to do so (which sets the same Registry key).
Tap on the Windows-key, type regedit.exe and hit enter.
Confirm the UAC prompt.
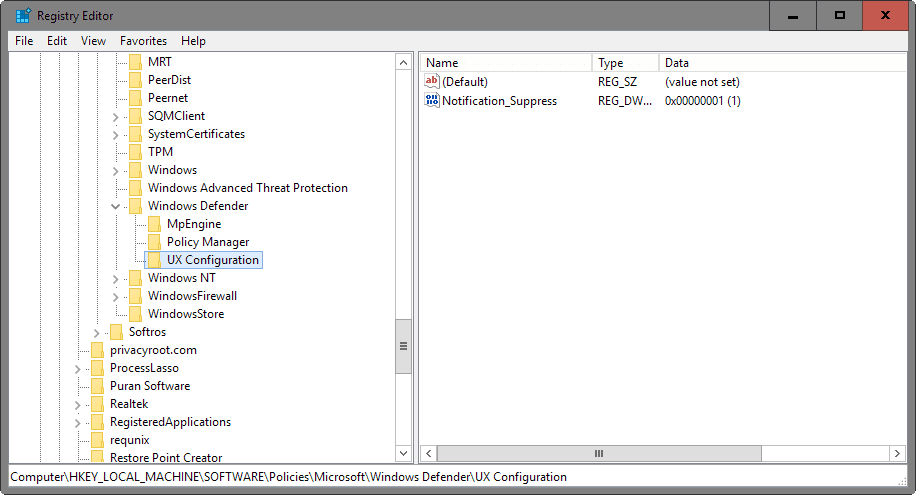
Navigate to the following key: HKEY_LOCAL_MACHINE\SOFTWARE\Policies\Microsoft\Windows Defender\UX Configuration
If a key does not exist, create it by right-clicking on its parent and selecting New > Key.
Right-click on UX Configuration and select New > Dword (32-bit) Value.
Name the new Dword Notification_Suppress.
Double-click on it afterwards and set its value to 1.
This suppresses notifications. If you want to revert the setting delete the Dword to do so.
Closing Words
Suppressing notifications won't stop Windows Defender from running on the device. You may still open the program and check the quarantine section for instance to restore blocked file downloads or files.
